Installation
and scanDoX-setup |
|
Go to the download
section of this website and fill out the download form.
|
scanDoX
will be send to you as an email.
|
Save the attached rpm-package
file to a directory on your hard drive.
|
Open a xterm
or another console as root.
(don't worry, the root right are needed only during install)
|
In this directory you will
find a rpm file. Install this rpm with rpm
-i scanDoX.rpm
or update from an existing to a newer version with rpm
-U scanDoX.rpm
|
| After the rpm is installed
you can type scanDoX-setup This command is
case-sensitive (as usual under Linux). |
| |
|
 |
| |
| This is propably
the first screen you wil see from scanDoX-setup.
That's because we need root rights to install scanDoX.
The reason for that is that we might have to modify a few
system config files. |
|
 |
| |
| So you are the master now.
Be careful not to become "the master of desaster"!
Alright then type scanDoX-setup |
|
 |
| |
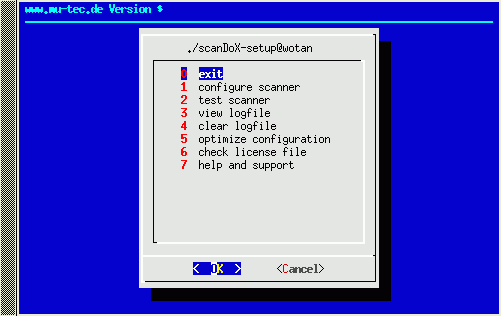
| Ok, we are now in the setup programm for scanDoX.
Let me explain the points now.
| exit |
guess! |
| configure scanner |
This runs the init scanner process and
probes the interfaces for scanner hardware |
| test scanner |
Detailed info on this point can be found
below. |
| view logfile |
Shows the scanDoX logfile, so that you
can determine what went wrong. (If something went wrong). |
| clear logfile |
The logfile may grow a little with the
time. So just clear. |
| optimize configuration |
Every USB-Device has a unique ID. But your
Linux may not know every hardware. This point ensures,
that the Fujitsu-scanners will be recognized. |
| check license file |
This routine checks, if the license file
is in the right place and if the structure is valid |
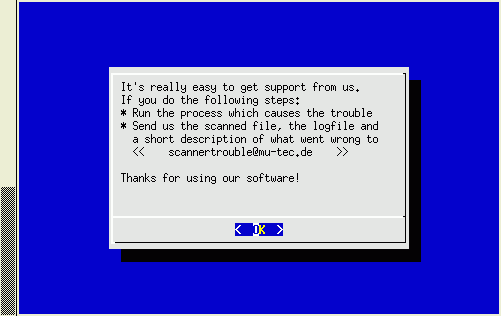
| help and support |
This point is about getting help and support.
|
|
|
 |
| |
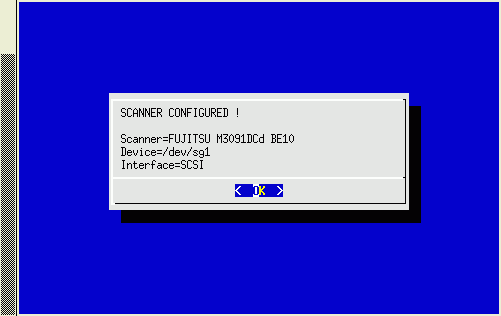
| After selecting the configure
scanner. A Dialog similar to this should come up.
If not. Check this:
- Is the scanner connected? Check the data
and power cables.
(no kidding. That happens faily often)
- Is the scanner online
- Did Linux recognize the scanner
|
|
 |
| |
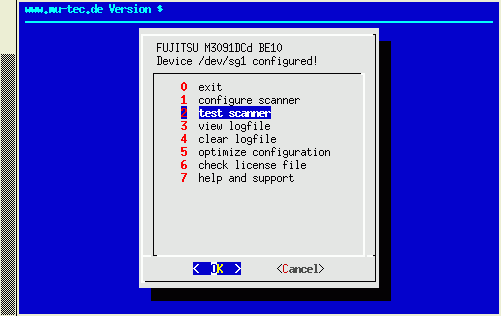
| After the configuration is done the headline
of the Dialogbox has changed.
You may want to test the configuration now. Select test
scanner to do so.
|
|
 |
| |
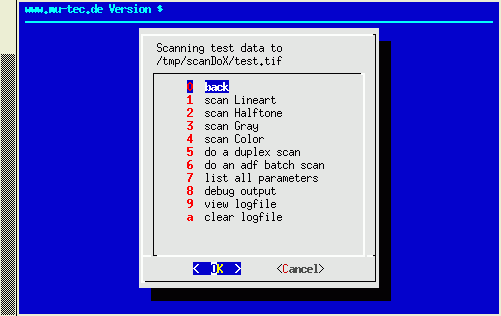
| In this menu you can select the basic scan-operations.
Just select one and press return, to start the scan.
Ops, there is a point left to mention:
list all parameters
Selecting this point will show you all features of your scanner. |
|
 |
| |
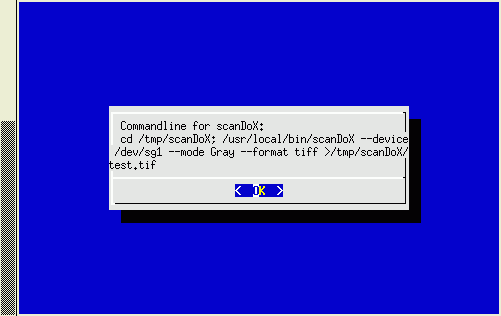
| After selecting one of the basic scan operations,
this dialog will appear.
It shows the exact commandline, with which the actual operation
was performed.
So it is more easy and transparent for you, what scanDoX is
doing. |
|
 |
| |
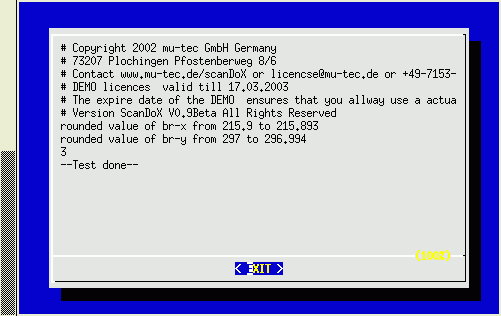
| This is a picture of a log-file after scanning.
(The 3 stands for the selected operation. scan gray) |
|
 |
| |
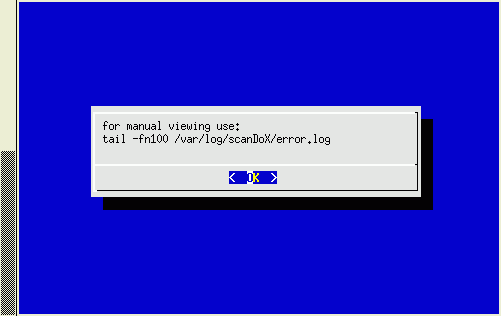
| If you want to view the log-file on the fly,
while scanning, type tail -fn /var/log/scanDoX/error.log
in another console or xterm. |
|
 |
| |
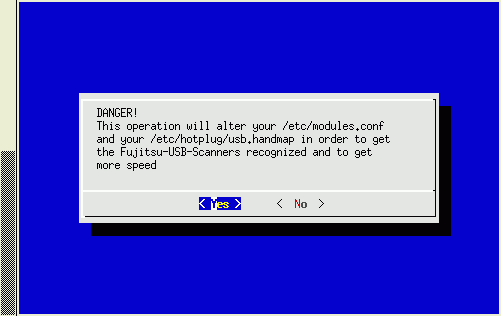
| As mentioned above: Every USB-Device has
a unique ID. But maybe your distribution may not know the
IDs of new Fujitsu-scanners. This point ensures, that the
recognition of the scanner works. But to do so, we have to
modify the modules.conf and usb.handmap files. We just append
our changes.
lt would be a good idea to backup these files before performing
this operation. |
|
 |
| |
| We really try to give you a good support.
But please make sure, that you have checked the "easy"
things and faq before mailing
us. Otherwise the developement is paralized by answering mails. |
|